
This is the second DIY Project featured from my sister’s little Country Themed Wedding! These DIY Colored Mason Jars made perfect centerpieces for her wedding reception tables! We are actually reusing these jars for my other sister’s baby shower next week!
Supplies you will need:
- Empty glass mason jars
- Paper towels
- Paper plate or newspaper
- Foil
- Mod Podge- Gloss Finish (there is only two kinds)
- Liquid food coloring, we used neon colors
- Baking sheet pan
- Oven preheated to 200°- 225° degrees or “Warm”

*my sister’s oven got super hot and burned the glasses at 225° but Sharon’s didn’t so it depends on how hot your oven gets. We suggest starting at 200° and do not exceed 225°
Directions:
Step 1: Line baking sheet with foil paper or wax paper. Make sure to cover the whole pan because mod podge is glue so it’s hard to to get off baking sheet. We suggest using an old baking sheet not used much.
Step 2: Add recommended drops of food coloring to mod podge bottle *It’s important not to add too much food coloring or the mixture will be too thin and result in streaking.

Step 3: Mix colored Mod Podge until color is mixed in and then pour into your glass jar.

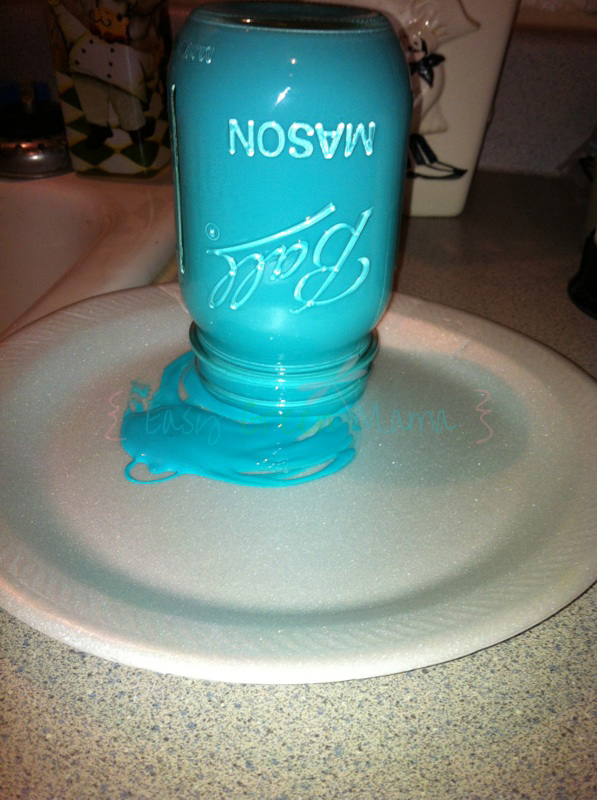
Step 4: Swirl the Mod Podge around until the entire inside of your jar is covered. Drain excess by placing jars upside down onto paper plate or newspaper. Wait 5 min or until most is drained and jar is covered (this will help get the rim which is hard to get while swirling)
Step 5: Carefully wipe the rim of your jar with a towel making sure none of the Mod Podge is on the outer lip. (We did 2 test jars first to make sure they came out good)
Step 6: After draining, carefully lift jars, re-wipe the rims and place upside down on lined baking sheet.

Step 7: Place in pre-heated oven for 20 minutes or until most extra paint has drained out (it may be a lot still) then flip jar over and bake for another 20 min. You can repeat until Mod Podge is completely dry and glass jars are transparent. Make sure to flip while baking because it will bubble up.
Step 8: Remove baking sheet from oven and allow hot jars to cool completely before handling. If they do not come out right just soak in water for a few hours and the glue will peel away.
*We added lace with a hot glue gun to give a little more character.
Check out the other post from the DIY Country Wedding Series:
- DIY Just Married Celebration Banner
- DIY Colored Mason Jars
- DIY Ring Bearer Pillow
- DIY Country Wedding Decorations & Ideas

This has been shared on the following sites:


How easy is that? I had no idea you could do this! Yours turned out beautifully. I’ll have to try this!
So easy! You’re clever!
I really like the lace addition. Much cuter than just a colored mason jar.
Those are beautiful! Such a great idea! Thanks for sharing!